
concatenate images and bulk rename images using python, pillow and PySimpleGUI
After my friend Dennis showed me his video about "merging" images, I discovered this excellent blog-post 'Concatenate images with Python, Pillow' of note.nkmk.me and decided to create my own tools with python, pillow and PySimpleGUI:
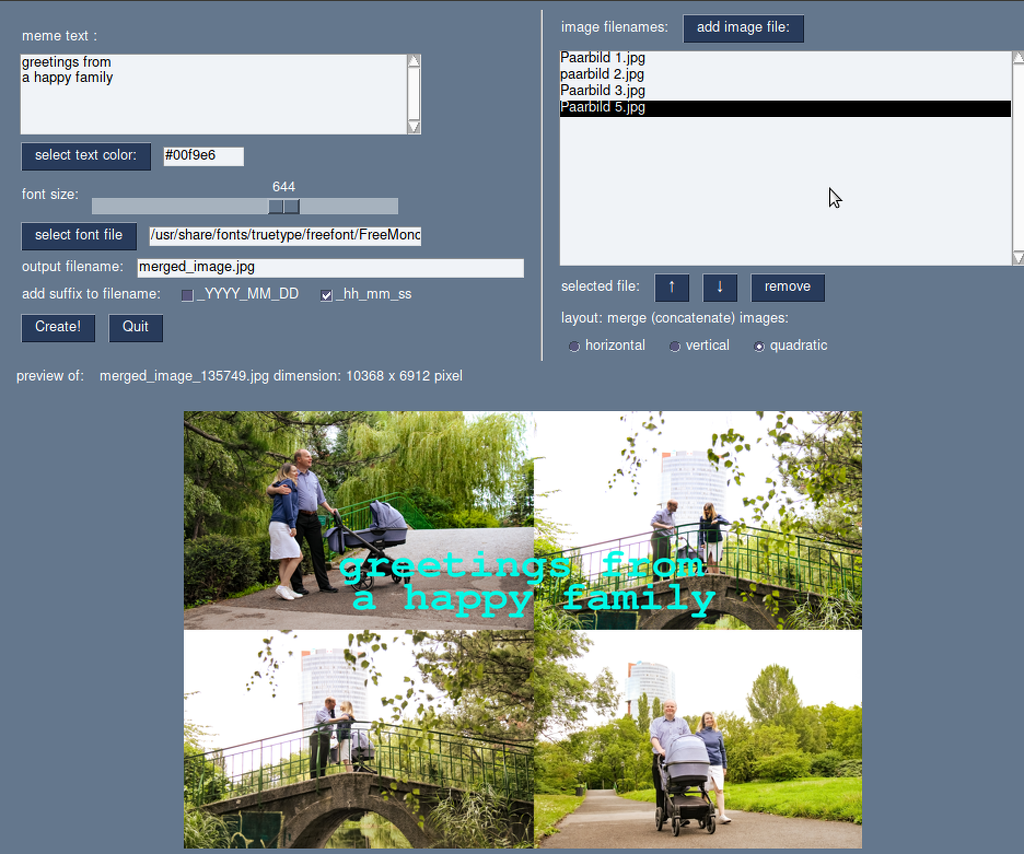
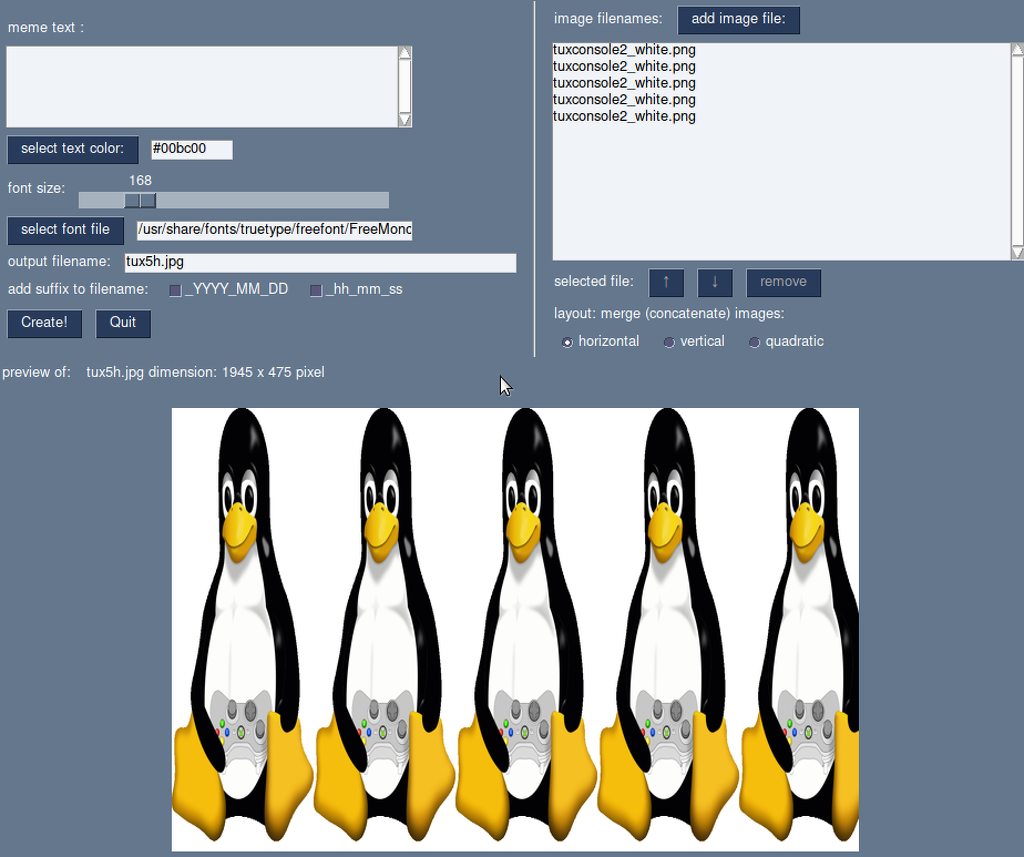
A simple Image macro tool to generate Internet Memes or greeting card photos, consisting of a GUI that allows to concatenate several images together into one big merged image and optionally add a text message to it.
While testing my new tool, I discovered the need for a second tool: to automatically add a dimension and orientation suffix (like: /640x400 pixel, horizontal/) to all my image filenames.
find the section about installing and running the tools
Note: The rest of this article is about my experiences while coding the image merge tool. If you are mostly interested in how to install and run the tools, please skip to the section install and running at the end of this article.
my experiences while coding the image merge tools
installing Pillow
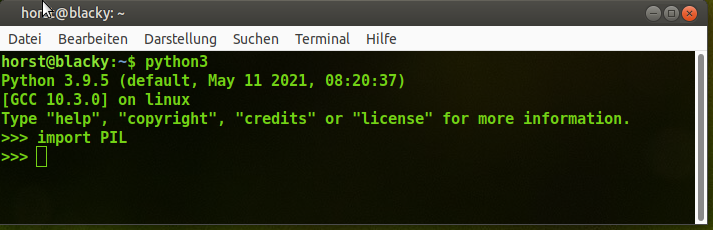
Pillow is a third-party library for python, and can be installed via ''pip3 install pillow'', according to the official documentation. Sadly, my Ubuntu Linux operating system refused this command by insisting that Pillow can not co-exist with PIL and PIL is already installed on my system. It took me some uninstalling, reinstalling and reading but finally I concluded that I already had Pillow installed via the ubuntu apt system, it was just referred as 'PIL' for historic reasons.
The note.nkmk.me blogpost about using Pillow to concatenate images is very well written with good documented example code for several use-cases, so that I had my first sense of achievement very fast by being able to merge some images into a big image.
To my delight, I also discovered in the official Pillow documentation that it is possible to draw multi-line text over an image; no all that I needed was a GUI to be able to edit text and select images with some level of comfort.
creating a GUI with PySimpleGUI
PySimpleGUI is already installed on my computer and frequently used for lessons with my students. I usually start by modifying the most basic example from the PySimpleGUI documentation and modify it according to my needs. I sent my first version of a GUI to Dennis who made a video about it:
selecting images
selecting images in File manager
This version of the GUI had no widget to enter image filenames because it was supposed to be started by right-clicking from the File-manager, while the selection of images is already done in the file-manager. You can see Dennis demonstrating this technique in the video above.
The file manager (Nautilus for Ubuntu, in my case Caja for Ubuntu Mate) has a special folder (for nautilus: '~/.local/share/nautilus/scripts', for caja, '~/.config/caja/scripts') where the python script must be placed and made executable.
I found the following python code to create a list of by file-manager selected files and folders:
# this script should be started by right-clicking from the file-manager, after having selected some files
import os
import PySimpleGUI as sg
filenames = []
for path in os.getenv('NAUTILUS_SCRIPT_SELECTED_FILE_PATHS', '').splitlines():
    filenames.append(path)

print(filenames) # print output is not readable when starting by right-click from file-manager
sg.Popup(f"selected files and folders: {filenames}")
selecting images using command line arguments
While this worked, I learned later that the file manager passes the selected filenames (and folder names) as command-line arguments to the python-script. I therefore rejected the code above and made both of my scripts to use command-line arguments:
import sys
import PySimpleGUI as sg

def main(filenames = []):
    print(filenames) # print output is not readable when starting by right-click from file-manager
    sg.Popup(f"selected files and folders: {filenames}")

if __name__ == "__main__":
    # sys.argv[0] is always the name of the python program itself
    main(sys.argv[1:]) # pass all other arguments to main (or an empty list is passed)
This approach has the advantage that the script can be started by right-click from file-manager or directly from the console with command line arguments, like:
python3 image_merge.py *.jpg *.png
At this point in time I began to understand that seeing the filenames (or even the preview-icons in the file-manager) is not enough to work efficient with an image concatenating-tool. I needed a way to instantly see the dimension (width x height in pixel) and orientation (horizontal, vertical, quadratic) of each image. My file-manager reveals the dimension of image files after a right-click on the selected image and some extra clicking. But what I really wanted was to see this information directly in the image filename.
batch renaming tool
Therefore I wrote a batch rename tool that recursively goes down into all sub (and sub-sub..) folders of a given start folder and renames all image files according to their dimension. Using 'os.walk' and the image open function from Pillow, the script is remarkably fast:
see source code and links at the end of this article
selecting images using a gui
Back to the image merging tool:
Because it is not possible to select the same image several times using the file-manager method, I added an GUI widget -a Listbox- and pre-populated it with the image-files selected by file-manager or command-line-arguments.
After adding some more widgets to better control the output-filename of the merged image I started adding buttons to change the order of the image files and to add and remove image files by GUI.
as quadratic as possible
Finally I came up with an algorithm to arrange the part-images of a merged image as quadratic as possible, an important feature when working with an uneven number of part-images. The code is neither very elegant nor compact, but it produces some usable output:
def splitme(x):
        """gives back a as-quadratic-as-possible list of list
        :param x:int = number of items (images)
        :returns list of lists

        4-> [[0,1], [2,3]]
        5-> [[0], [1,2], [3,4]]
        6-> [[0,1],[2,3], [4,5]]
        7-> [[0], [1,2,3], [4,5,6]
        8-> [[0,1], [2,3,4], [5,6,7]]
        9-> [[0,1,2], [3,4,5], [6,7,8]]
        ...
        """

        result = []
        i = 0
        root = x ** 0.5
        smallroot = int(root)
        bigroot = int(root + 1)
        if root == int(root):
            rowrange = range(int(root))
            colrange = range(int(root))
        elif abs(x - smallroot ** 2) < abs(bigroot ** 2 - x):
            bestroot = smallroot
            line = list(range(0, x - bestroot ** 2))
            result.append(line)
            i = len(line)
            rowrange = range(bestroot)
            colrange = range(bestroot)
        else:
            bestroot = bigroot
            # return bestroot - (bestroot**2 - x), "+", bestroot-1 ,"x" , bestroot
            line = list(range(bestroot - (bestroot ** 2 - x)))
            i = len(line)
            result.append(line)
            rowrange = range(bestroot-1)
            colrange=  range(bestroot)
        for row in rowrange:
            line = []
            for col in colrange:
                line.append(i)
                i += 1
            result.append(line)
        return result
All in all, I am very satisfied with my tools and the relative short time necessary to create them. Working with the Pillow library is very straightforward, and I had not many problems to integrate the Pillow-functionality with PySimpleGUI. One feature of PySimpleGUI that is currently not well documented is the use of 'Widget', allowing the use Tkinter-functionality directly out of PySimpleGUI. It helps to search the Issues section on the PysimpleGUI Github page, where the PySimpleGUI author is very active answering questions.
I had much fun coding those tools and I hope that others can enjoy my work as well. There are of course endless opportunities to improve the script with more features. I may explore some of them in my ThePythonGameBook project.
more videos
While I was busy writing this blog posting, Dennis already released a new video where he demonstrates using an updated (but not the newest) version of the image-merge tool:
source code
both scripts (image_merge.py and batch_rename.py) can be found in this Github gist:
- https://gist.github.com/horstjens/9111c7cc3edc1a3eb45a9f9586d9dca2
- Both scripts can also be found at my ThePythonGameBook project on Github
how to install and run the scripts
install the scripts
(Those instructions assume you are running Ubuntu Linux. The scripts will also work with other Linux flavors or even with other operating systems like Windows and Mac operating systems, but you may have to research yourself how to start them via file-manager).
First, make sure those programs / libraries are correctly installed on your computer:
- python3 https://python.org
- PySimpleGUI https://pysimplegui.readthedocs.io/en/latest/
- Pillow (or PIL) https://pillow.readthedocs.io/en/stable/
Second, copy both scripts (image_merge.py and batch_rename.py) form the Github Gist link above into a folder on your computer. This folder is ideally the folder where your have already placed some image files to work with.
run the scripts
Now you can open a terminal in this folder and type:
* python3 image_merge.py *.jpg to select all '.jpg' files in this folder
* python3 batch_rename.py to rename all image files in this folder and in all of it's sub-folders.
You can also just open the python scripts (from terminal or from your python editor) and run them without any command line arguments.
If you prefer selecting files from your File manager (caja / nautilus), then place both python scripts into the folder '~/.config/caja/scripts' or '~/.local/share/nautilus/scripts' and make them executable. You can start now both scripts by selecting image files / folders with your file manager, right-clicking and choosing "scripts" in the context-menu.